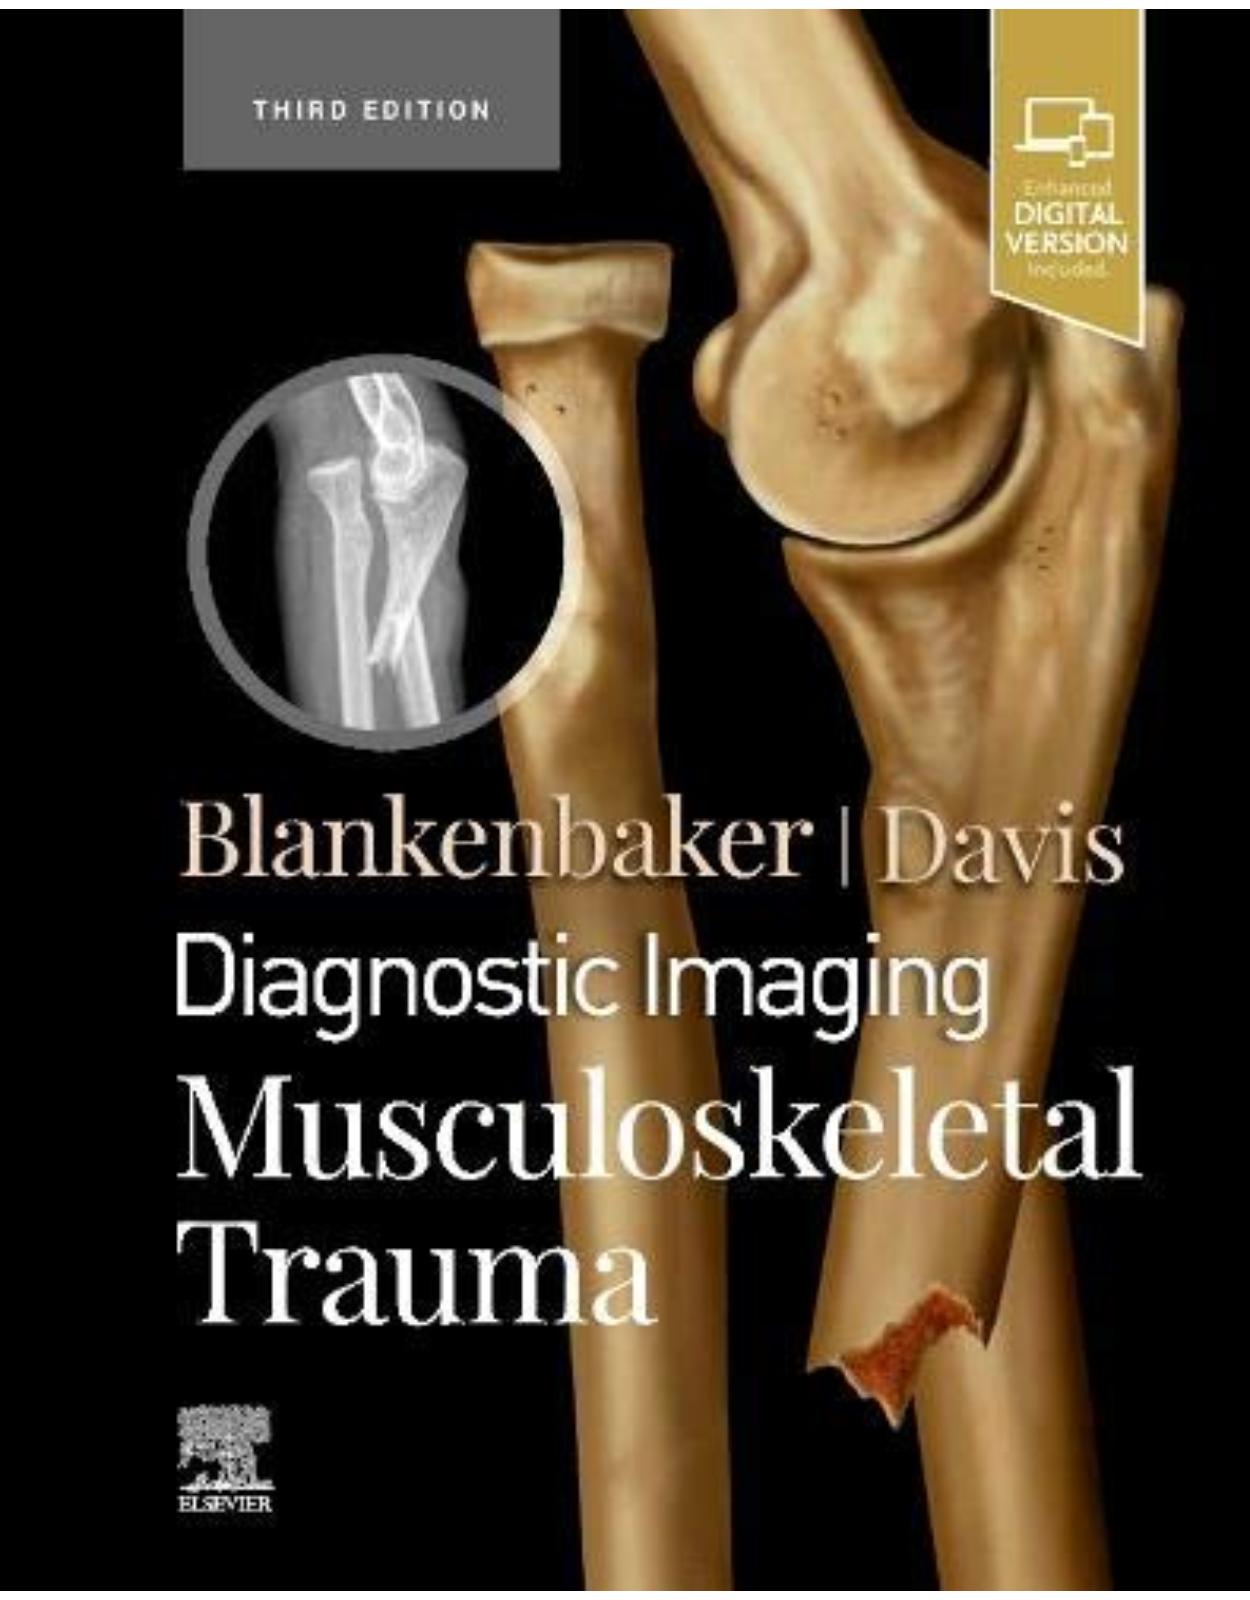
Diagnostic Imaging: Musculoskeletal Trauma
Livrare gratis la comenzi peste 500 RON. Pentru celelalte comenzi livrarea este 20 RON.
Disponibilitate: La comanda in 3-4 saptamani
Editura: Elsevier
Limba: Engleza
Nr. pagini: 1200
Coperta: Hardcover
Dimensiuni:
An aparitie: 26/05/2021
Description:
Covering the entire spectrum of this fast-changing field, Diagnostic Imaging: Musculoskeletal Trauma, third edition, is an invaluable resource for general radiologists, musculoskeletal imaging specialists, and trainees—anyone who requires an easily accessible, highly visual reference on today’s imaging of musculoskeletal injury and trauma. World-renowned authorities provide updated information on more than 200 adult and pediatric trauma-related diagnoses, all lavishly illustrated, delineated, and referenced, making this edition a useful learning tool as well as a handy reference for daily practice.
Serves as a one-stop resource for key concepts and information, highlighted by thousands of extensively annotated digital images and 350 full-color illustrations
Features updates from cover to cover including new literature, new images, and refined diagnoses, plus new content on hardware and surgical approaches, femoroacetabular impingement (AIF), athletic pubalgia, and more
Contains new chapters in the foot and ankle section on Chopart joint injury, nerve injury, and anterolateral impingement
Presents the advantages and disadvantages of particular imaging techniques for diagnosis and characterization of specific musculoskeletal injury and trauma
Includes material specific to pediatric patients, including detailed, dedicated chapters on child abuse and growth plate injuries
Contains a traumatic injury overview and section on special topics including fracture healing and pathologic fracture coverage
Provides numerous ultrasound examples and explanations to increase your knowledge and skill with this often-challenging modality in the evaluation of musculoskeletal injury
Uses bulleted, succinct text and highly templated chapters for quick comprehension of essential information at the point of care
Table of Contents:
SECTION 1: INTRODUCTION
OVERVIEW
Chapter 1: Introduction to Traumatic Injury
Main Text
TRAUMATIC INJURY, SPECIAL TOPICS
Chapter 2: Fracture Healing
Key Facts
Key Images
Main Text
Image Gallery
Chapter 3: Pathologic Fracture
Key Facts
Key Images
Main Text
Image Gallery
Chapter 4: Physeal Injury (Salter-Harris Fracture)
Key Facts
Key Images
Main Text
Image Gallery
Chapter 5: Child Abuse: Extremities
Key Facts
Key Images
Main Text
Image Gallery
Chapter 6: Muscle Injury
Key Facts
Key Images
Main Text
Image Gallery
Chapter 7: Hematoma
Key Facts
Key Images
Main Text
Image Gallery
Chapter 8: Foreign Body
Key Facts
Key Images
Main Text
Image Gallery
Chapter 9: Intramedullary Nail/Rod
Key Facts
Key Images
Main Text
Image Gallery
Chapter 10: Plate Fixation
Key Facts
Key Images
Main Text
Image Gallery
Chapter 11: Screw Fixation
Key Facts
Key Images
Main Text
Image Gallery
SECTION 2: SHOULDER AND HUMERUS
INTRODUCTION AND OVERVIEW
Chapter 12: Shoulder and Humerus Overview
Main Text
Image Gallery
BONES AND JOINTS
Chapter 13: Sternoclavicular Joint Injury
Key Facts
Key Images
Main Text
Image Gallery
Chapter 14: Clavicle Fracture
Key Facts
Key Images
Main Text
Image Gallery
Chapter 15: Acromioclavicular Joint Injury
Key Facts
Key Images
Main Text
Image Gallery
Chapter 16: Posttraumatic Osteolysis, Distal Clavicle
Key Facts
Key Images
Main Text
Image Gallery
Chapter 17: Scapula Fracture
Key Facts
Key Images
Main Text
Image Gallery
Chapter 18: Anterior Glenohumeral Dislocation
Key Facts
Key Images
Main Text
Image Gallery
Chapter 19: Posterior Glenohumeral Dislocation
Key Facts
Key Images
Main Text
Image Gallery
Chapter 20: Inferior Glenohumeral Dislocation and Luxatio Erecta
Key Facts
Key Images
Main Text
Image Gallery
Chapter 21: Greater Tuberosity Fracture
Key Facts
Key Images
Main Text
Image Gallery
Chapter 22: Osteochondral Injury, Shoulder
Key Facts
Key Images
Main Text
Image Gallery
Chapter 23: Humeral Head/Neck Fracture
Key Facts
Key Images
Main Text
Image Gallery
Chapter 24: Little Leaguer's Shoulder
Key Facts
Key Images
Main Text
Image Gallery
Chapter 25: Tug Lesion, Humerus
Key Facts
Key Images
Main Text
Image Gallery
Chapter 26: Humeral Shaft Fracture
Key Facts
Key Images
Main Text
Image Gallery
Chapter 27: Os Acromiale
Key Facts
Key Images
Main Text
Image Gallery
MUSCLES AND TENDONS
SHOULDER GIRDLE
Chapter 28: Pectoralis Injury
Key Facts
Key Images
Main Text
Image Gallery
Chapter 29: Deltoid Muscle Injury
Key Facts
Key Images
Main Text
Image Gallery
Chapter 30: Proximal Triceps Injury
Key Facts
Key Images
Main Text
Image Gallery
ROTATOR CUFF
Chapter 31: Rotator Cuff Impingement
Key Facts
Key Images
Main Text
Image Gallery
Chapter 32: Rotator Cuff Tendinopathy
Key Facts
Key Images
Main Text
Image Gallery
Chapter 33: Rotator Cuff Partial-Thickness Tear
Key Facts
Key Images
Main Text
Image Gallery
Chapter 34: Rotator Cuff Full-Thickness Tear
Key Facts
Key Images
Main Text
Image Gallery
Chapter 35: Rotator Interval Tear
Key Facts
Key Images
Main Text
Image Gallery
Chapter 36: Subscapularis Tear
Key Facts
Key Images
Main Text
Image Gallery
Chapter 37: Rotator Cuff Postoperative Repair
Key Facts
Key Images
Main Text
Image Gallery
Chapter 38: Calcific Tendinopathy, Rotator Cuff
Key Facts
Key Images
Main Text
Image Gallery
PROXIMAL BICEPS TENDON
Chapter 39: Biceps Tendinopathy, Shoulder
Key Facts
Key Images
Main Text
Image Gallery
Chapter 40: Biceps Tendon Tear, Intraarticular
Key Facts
Key Images
Main Text
Image Gallery
Chapter 41: Biceps Tendon Dislocation
Key Facts
Key Images
Main Text
Image Gallery
CAPSULE AND LABRUM
INSTABILITY AND LABRUM
Chapter 42: Normal Labral Variants
Key Facts
Key Images
Main Text
Image Gallery
Chapter 43: Adhesive Capsulitis, Shoulder
Key Facts
Key Images
Main Text
Image Gallery
Chapter 44: Bankart Lesion
Key Facts
Key Images
Main Text
Image Gallery
Chapter 45: ALPSA Lesion
Key Facts
Key Images
Main Text
Image Gallery
Chapter 46: Other Bankart Variation Lesions
Key Facts
Key Images
Main Text
Image Gallery
Chapter 47: GLAD/GARD Lesion
Key Facts
Key Images
Main Text
Image Gallery
Chapter 48: HAGL Lesion
Key Facts
Key Images
Main Text
Image Gallery
Chapter 49: Inferior Glenohumeral Ligament Injury
Key Facts
Key Images
Main Text
Image Gallery
Chapter 50: Bennett Lesion
Key Facts
Key Images
Main Text
Image Gallery
Chapter 51: Posterior Labral Tear, Shoulder
Key Facts
Key Images
Main Text
Image Gallery
Chapter 52: Extended Labral Tears
Key Facts
Key Images
Main Text
Image Gallery
Chapter 53: Multidirectional Instability, Shoulder
Key Facts
Key Images
Main Text
Image Gallery
Chapter 54: Labrum and Instability Lesions, Shoulder: Postoperative Imaging
Key Facts
Key Images
Main Text
Image Gallery
SUPERIOR LABRUM
Chapter 55: SLAP Tear
Key Facts
Key Images
Main Text
Image Gallery
Chapter 56: Extended SLAP Tear
Key Facts
Key Images
Main Text
Image Gallery
COMBINED CUFF AND LABRAL LESIONS
Chapter 57: Internal Impingement, Shoulder
Key Facts
Key Images
Main Text
Image Gallery
Chapter 58: Microinstability, Shoulder
Key Facts
Key Images
Main Text
Image Gallery
OTHER
Chapter 59: Suprascapular and Spinoglenoid Notch Cysts
Key Facts
Key Images
Main Text
Image Gallery
Chapter 60: Rotator Cuff Denervation Syndromes
Key Facts
Key Images
Main Text
Image Gallery
SECTION 3: ELBOW
INTRODUCTION AND OVERVIEW
Chapter 61: Elbow Overview
Main Text
Image Gallery
BONES AND JOINTS
Chapter 62: Distal Humerus Fracture
Key Facts
Key Images
Main Text
Image Gallery
Chapter 63: Transcondylar (Supracondylar) Fracture, Elbow
Key Facts
Key Images
Main Text
Image Gallery
Chapter 64: Lateral Condyle Fracture, Elbow
Key Facts
Key Images
Main Text
Image Gallery
Chapter 65: Medial Condyle Fracture, Elbow
Key Facts
Key Images
Main Text
Image Gallery
Chapter 66: Capitellum Fracture
Key Facts
Key Images
Main Text
Image Gallery
Chapter 67: Elbow Dislocation
Key Facts
Key Images
Main Text
Image Gallery
Chapter 68: Monteggia Injury
Key Facts
Key Images
Main Text
Image Gallery
Chapter 69: Osteochondral Injury, Elbow
Key Facts
Key Images
Main Text
Image Gallery
Chapter 70: Radial Head/Neck Fracture
Key Facts
Key Images
Main Text
Image Gallery
Chapter 71: Olecranon Fracture
Key Facts
Key Images
Main Text
Image Gallery
Chapter 72: Coronoid Fracture
Key Facts
Key Images
Main Text
Image Gallery
Chapter 73: Forearm Fractures
Key Facts
Key Images
Main Text
Image Gallery
LIGAMENTS
Chapter 74: Radial Collateral Ligament Injury
Key Facts
Key Images
Main Text
Image Gallery
Chapter 75: Lateral Ulnar Collateral Ligament Injury
Key Facts
Key Images
Main Text
Image Gallery
Chapter 76: Annular Ligament Injury
Key Facts
Key Images
Main Text
Image Gallery
Chapter 77: Ulnar Collateral Ligament Injury
Key Facts
Key Images
Main Text
Image Gallery
Chapter 78: Valgus Stress Mechanism/Little Leaguer's Elbow
Key Facts
Key Images
Main Text
Image Gallery
TENDONS
Chapter 79: Biceps Tendon Injury, Elbow
Key Facts
Key Images
Main Text
Image Gallery
Chapter 80: Triceps Tendon Injury, Elbow
Key Facts
Key Images
Main Text
Image Gallery
Chapter 81: Common Extensor Tendon Injury
Key Facts
Key Images
Main Text
Image Gallery
Chapter 82: Common Flexor-Pronator Tendon Injury
Key Facts
Key Images
Main Text
Image Gallery
Chapter 83: Brachialis Injury
Key Facts
Key Images
Main Text
Image Gallery
OTHER
Chapter 84: Intraarticular Bodies, Elbow
Key Facts
Key Images
Main Text
Image Gallery
Chapter 85: Synovial Fringe, Elbow
Key Facts
Key Images
Main Text
Image Gallery
Chapter 86: Posterior Impingement, Elbow
Key Facts
Key Images
Main Text
Image Gallery
Chapter 87: Anconeus Epitrochlearis
Key Facts
Key Images
Main Text
Image Gallery
Chapter 88: Olecranon Bursitis
Key Facts
Key Images
Main Text
Image Gallery
Chapter 89: Bicipitoradial Bursitis
Key Facts
Key Images
Main Text
Image Gallery
Chapter 90: Ulnar Nerve Injury, Elbow
Key Facts
Key Images
Main Text
Image Gallery
Chapter 91: Median Nerve Injury, Elbow
Key Facts
Key Images
Main Text
Image Gallery
Chapter 92: Radial Nerve Injury, Elbow
Key Facts
Key Images
Main Text
Image Gallery
SECTION 4: WRIST AND HAND
INTRODUCTION AND OVERVIEW
Chapter 93: Wrist and Hand Overview
Main Text
Image Gallery
Chapter 94: Ossicles and Sesamoids, Wrist and Hand
Key Facts
Key Images
Main Text
Image Gallery
Chapter 95: Acronyms and Eponyms, Wrist and Hand
Key Facts
Key Images
Main Text
Image Gallery
BONES AND JOINTS
DISTAL RADIUS AND ULNA
Chapter 96: Juvenile Distal Forearm Fractures
Key Facts
Key Images
Main Text
Image Gallery
Chapter 97: Distal Radius Fracture
Key Facts
Key Images
Main Text
Tables
Image Gallery
Chapter 98: Die-Punch Fracture
Key Facts
Key Images
Main Text
Image Gallery
Chapter 99: Distal Radius Fracture: Postoperative Imaging
Key Facts
Key Images
Main Text
Image Gallery
Chapter 100: Ulnar Styloid Fracture
Key Facts
Key Images
Main Text
Image Gallery
Chapter 101: Trauma-Related Osteolysis, Pediatric Wrist
Key Facts
Key Images
Main Text
Image Gallery
Chapter 102: Distal Radioulnar Joint Instability
Key Facts
Key Images
Main Text
Image Gallery
WRIST
Chapter 103: Scaphoid Fracture
Key Facts
Key Images
Main Text
Image Gallery
Chapter 104: Scaphoid Fracture, Postoperative Imaging
Key Facts
Key Images
Main Text
Image Gallery
Chapter 105: Carpal Fractures, Other than Scaphoid
Key Facts
Key Images
Main Text
Image Gallery
Chapter 106: Carpal Dislocation
Key Facts
Key Images
Main Text
Image Gallery
Chapter 107: Carpal Impaction Syndromes
Key Facts
Key Images
Main Text
Image Gallery
Chapter 108: Ulnar Impingement Syndrome
Key Facts
Key Images
Main Text
Image Gallery
HAND
Chapter 109: Metacarpal Fracture and Dislocation
Key Facts
Key Images
Main Text
Image Gallery
Chapter 110: Finger Fracture and Dislocation
Key Facts
Key Images
Main Text
Image Gallery
Chapter 111: Hand Fractures, Postoperative Imaging
Key Facts
Key Images
Main Text
Image Gallery
LIGAMENTS
WRIST
Chapter 112: Intrinsic Ligament Tear, Wrist
Key Facts
Key Images
Main Text
Image Gallery
Chapter 113: Triangular Fibrocartilage Complex Injury
Key Facts
Key Images
Main Text
Image Gallery
Chapter 114: Carpal Instability
Key Facts
Key Images
Main Text
Image Gallery
HAND
Chapter 115: Collateral Ligament Injury, Fingers and Thumb
Key Facts
Key Images
Main Text
Image Gallery
TENDONS
Chapter 116: Flexor Tendon Injury, Wrist and Hand
Key Facts
Key Images
Main Text
Tables
Image Gallery
Chapter 117: Extensor Tendon Injury, Wrist and Hand
Key Facts
Key Images
Main Text
Tables
Image Gallery
OTHER
Chapter 118: Ganglion, Wrist
Key Facts
Key Images
Main Text
Image Gallery
Chapter 119: Vascular Injury, Wrist and Hand
Key Facts
Key Images
Main Text
Image Gallery
Chapter 120: Nerve Entrapment Syndromes, Wrist
Key Facts
Key Images
Main Text
Image Gallery
SECTION 5: HIP AND PELVIS
INTRODUCTION AND OVERVIEW
Chapter 121: Hip and Pelvis Overview
Main Text
Image Gallery
BONES AND JOINTS
HIP AND PROXIMAL FEMUR
Chapter 122: Hip Dislocation
Key Facts
Key Images
Main Text
Image Gallery
Chapter 123: Femoral Head Fracture
Key Facts
Key Images
Main Text
Image Gallery
Chapter 124: Femoral Neck Fracture
Key Facts
Key Images
Main Text
Image Gallery
Chapter 125: Trochanter and Intertrochanteric Fracture
Key Facts
Key Images
Main Text
Image Gallery
Chapter 126: Subtrochanteric and Femoral Shaft Fracture
Key Facts
Key Images
Main Text
Image Gallery
PELVIS
Chapter 127: Acetabulum Fractures
Key Facts
Key Images
Main Text
Image Gallery
Chapter 128: Disruptions of Pelvic Ring
Key Facts
Key Images
Main Text
Image Gallery
Chapter 129: Sacrum Fractures, Traumatic
Key Facts
Key Images
Main Text
Image Gallery
Chapter 130: Isolated Pelvis Injuries, Traumatic
Key Facts
Key Images
Main Text
Image Gallery
Chapter 131: Pelvis Avulsion Fracture/Apophysitis
Key Facts
Key Images
Main Text
Image Gallery
Chapter 132: Pelvis Stress Fractures
Key Facts
Key Images
Main Text
Image Gallery
POSTOPERATIVE IMAGING
Chapter 133: Pelvis/Hip/Femur Trauma: Postoperative Imaging
Key Facts
Key Images
Main Text
Image Gallery
Chapter 134: FAI and Adult DDH: Postoperative Imaging
Key Facts
Key Images
Main Text
Image Gallery
LABRUM AND INTRAARTICULAR STRUCTURES
Chapter 135: Acetabular Labral Tear
Key Facts
Key Images
Main Text
Image Gallery
Chapter 136: Acetabular Labral Injury: Postoperative Imaging
Key Facts
Key Images
Main Text
Image Gallery
Chapter 137: Femoroacetabular Impingement Morphology
Key Facts
Key Images
Main Text
Image Gallery
Chapter 138: Chondral and Osteochondral Abnormalities, Hip
Key Facts
Key Images
Main Text
Image Gallery
Chapter 139: Ligamentum Teres Injury
Key Facts
Key Images
Main Text
Image Gallery
MUSCLES AND TENDONS
Chapter 140: Hip Abductor and Rotator Injury
Key Facts
Key Images
Main Text
Image Gallery
Chapter 141: Hip Flexor Injury
Key Facts
Key Images
Main Text
Image Gallery
Chapter 142: Hip Adductor Injury
Key Facts
Key Images
Main Text
Image Gallery
Chapter 143: Snapping Hip Syndrome
Key Facts
Key Images
Main Text
Image Gallery
Chapter 144: Ischiofemoral Impingement
Key Facts
Key Images
Main Text
Image Gallery
Chapter 145: Proximal Hamstring Injury
Key Facts
Key Images
Main Text
Image Gallery
Chapter 146: Abdominal Muscle Injury
Key Facts
Key Images
Main Text
Image Gallery
Chapter 147: Athletic Pubalgia
Key Facts
Key Images
Main Text
Image Gallery
Chapter 148: Osteitis Pubis
Key Facts
Key Images
Main Text
Image Gallery
Chapter 149: True Hernias
Key Facts
Key Images
Main Text
Image Gallery
OTHER
Chapter 150: Bursitis, Hip and Pelvis
Key Facts
Key Images
Main Text
Image Gallery
Chapter 151: Piriformis Syndrome and Nerve Injuries of Pelvis
Key Facts
Key Images
Main Text
Image Gallery
SECTION 6: KNEE
INTRODUCTION AND OVERVIEW
Chapter 152: Knee Overview
Main Text
Image Gallery
BONES AND JOINTS
Chapter 153: Distal Femur Fracture
Key Facts
Key Images
Main Text
Image Gallery
Chapter 154: Tibial Plateau Fracture
Key Facts
Key Images
Main Text
Image Gallery
Chapter 155: Tibiofemoral Dislocation
Key Facts
Key Images
Main Text
Image Gallery
Chapter 156: Proximal Tibiofibular Joint Injury and Proximal Fibula Fracture
Key Facts
Key Images
Main Text
Image Gallery
Chapter 157: Patella Fracture
Key Facts
Key Images
Main Text
Image Gallery
Chapter 158: Avulsion, Knee
Key Facts
Key Images
Main Text
Image Gallery
Chapter 159: Tibial and Fibular Shaft Fractures
Key Facts
Key Images
Main Text
Image Gallery
Chapter 160: Stress Injury, Leg
Key Facts
Key Images
Main Text
Image Gallery
Chapter 161: Toddler Fracture
Key Facts
Key Images
Main Text
Image Gallery
Chapter 162: Osteochondral Injury, Knee
Key Facts
Key Images
Main Text
Image Gallery
Chapter 163: Cartilage Injury, Knee
Key Facts
Key Images
Main Text
Image Gallery
Chapter 164: Subchondral Fracture, Knee
Key Facts
Key Images
Main Text
Image Gallery
Chapter 165: Articular Cartilage: Postoperative Imaging
Key Facts
Key Images
Main Text
Image Gallery
LIGAMENTS
Chapter 166: Anterior Cruciate Ligament Injury
Key Facts
Key Images
Main Text
Image Gallery
Chapter 167: Anterior Cruciate Ligament: Postoperative Imaging
Key Facts
Key Images
Main Text
Image Gallery
Chapter 168: Posterior Cruciate Ligament Injury
Key Facts
Key Images
Main Text
Image Gallery
Chapter 169: Medial Collateral Ligament Injury, Knee
Key Facts
Key Images
Main Text
Image Gallery
Chapter 170: Lateral Collateral Ligament Complex Injury, Knee
Key Facts
Key Images
Main Text
Image Gallery
Chapter 171: Posterolateral Corner Injury
Key Facts
Key Images
Main Text
Image Gallery
Chapter 172: Iliotibial Band Friction Syndrome
Key Facts
Key Images
Main Text
Image Gallery
MENISCI
Chapter 173: Meniscus Pitfalls and Variations
Key Facts
Key Images
Main Text
Image Gallery
Chapter 174: Discoid Meniscus
Key Facts
Key Images
Main Text
Image Gallery
Chapter 175: Meniscus Degeneration
Key Facts
Key Images
Main Text
Image Gallery
Chapter 176: Meniscus Root Injury
Key Facts
Key Images
Main Text
Image Gallery
Chapter 177: Meniscus Horizontal Tear
Key Facts
Key Images
Main Text
Image Gallery
Chapter 178: Meniscus Radial Tear
Key Facts
Key Images
Main Text
Image Gallery
Chapter 179: Meniscus Vertical Longitudinal Tear
Key Facts
Key Images
Main Text
Image Gallery
Chapter 180: Meniscus Bucket-Handle Tear
Key Facts
Key Images
Main Text
Image Gallery
Chapter 181: Other Displaced Meniscus Tears
Key Facts
Key Images
Main Text
Image Gallery
Chapter 182: Complex Meniscus Tear
Key Facts
Key Images
Main Text
Image Gallery
Chapter 183: Meniscocapsular Separation
Key Facts
Key Images
Main Text
Image Gallery
Chapter 184: Popliteomeniscal Fascicles
Key Facts
Key Images
Main Text
Image Gallery
Chapter 185: Parameniscal Cyst
Key Facts
Key Images
Main Text
Image Gallery
Chapter 186: Intrameniscal Cyst
Key Facts
Key Images
Main Text
Image Gallery
Chapter 187: Meniscal Ossicle
Key Facts
Key Images
Main Text
Image Gallery
Chapter 188: Menisci: Postoperative Imaging
Key Facts
Key Images
Main Text
Image Gallery
TENDONS
Chapter 189: Quadriceps Injury
Key Facts
Key Images
Main Text
Image Gallery
Chapter 190: Patellar Tendon Injury
Key Facts
Key Images
Main Text
Image Gallery
Chapter 191: Transient Patella Dislocation
Key Facts
Key Images
Main Text
Image Gallery
Chapter 192: Pes Anserine Bursitis
Key Facts
Key Images
Main Text
Image Gallery
Chapter 193: Posteromedial Corner Injury
Key Facts
Key Images
Main Text
Image Gallery
Chapter 194: Plantaris Tendon Injury
Key Facts
Key Images
Main Text
Image Gallery
OTHER
Chapter 195: Popliteal Cyst
Key Facts
Key Images
Main Text
Image Gallery
Chapter 196: Intercondylar Notch Cyst
Key Facts
Key Images
Main Text
Image Gallery
Chapter 197: Prepatellar and Pretibial Bursitis
Key Facts
Key Images
Main Text
Image Gallery
Chapter 198: Deep Infrapatellar Bursitis
Key Facts
Key Images
Main Text
Image Gallery
Chapter 199: Medial Patellar Plica Syndrome
Key Facts
Key Images
Main Text
Image Gallery
Chapter 200: Peroneal Nerve Injury
Key Facts
Key Images
Main Text
Image Gallery
Chapter 201: Compartment Syndrome and Muscle Hernia
Key Facts
Key Images
Main Text
Image Gallery
SECTION 7: ANKLE AND FOOT
INTRODUCTION AND OVERVIEW
Chapter 202: Ankle and Foot Overview
Main Text
Image Gallery
Chapter 203: Accessory Ossicles, Ankle and Foot
Key Facts
Key Images
Main Text
Image Gallery
Chapter 204: Accessory Muscles, Ankle and Foot
Key Facts
Key Images
Main Text
Image Gallery
BONES AND JOINTS
Chapter 205: Pilon Fracture
Key Facts
Key Images
Main Text
Image Gallery
Chapter 206: Malleolus Fracture
Key Facts
Key Images
Main Text
Image Gallery
Chapter 207: Ankle Dislocation
Key Facts
Key Images
Main Text
Image Gallery
Chapter 208: Osteochondral Injury, Ankle
Key Facts
Key Images
Main Text
Image Gallery
Chapter 209: Talus Fracture, Body and Processes
Key Facts
Key Images
Main Text
Image Gallery
Chapter 210: Talus Fracture, Neck and Head
Key Facts
Key Images
Main Text
Image Gallery
Chapter 211: Talus Dislocation
Key Facts
Key Images
Main Text
Image Gallery
Chapter 212: Calcaneus Fracture, Intraarticular
Key Facts
Key Images
Main Text
Image Gallery
Chapter 213: Calcaneus Fracture, Extraarticular
Key Facts
Key Images
Main Text
Image Gallery
Chapter 214: Navicular Fracture and Dislocation
Key Facts
Key Images
Main Text
Image Gallery
Chapter 215: Cuboid Fracture
Key Facts
Key Images
Main Text
Image Gallery
Chapter 216: Lisfranc Ligament Injury
Key Facts
Key Images
Main Text
Image Gallery
Chapter 217: Lisfranc Fracture-Dislocation
Key Facts
Key Images
Main Text
Image Gallery
Chapter 218: Metatarsal Fracture
Key Facts
Key Images
Main Text
Image Gallery
Chapter 219: Toe Fracture and Dislocation
Key Facts
Key Images
Main Text
Image Gallery
Chapter 220: Stress Fracture, Ankle and Foot
Key Facts
Key Images
Main Text
Image Gallery
Chapter 221: Salter-Harris Fractures, Ankle
Key Facts
Key Images
Main Text
Image Gallery
Chapter 222: Freiberg Infraction
Key Facts
Key Images
Main Text
Image Gallery
LIGAMENTS
Chapter 223: Syndesmosis Ligament Injury, Ankle
Key Facts
Key Images
Main Text
Image Gallery
Chapter 224: Ankle Sprain
Key Facts
Key Images
Main Text
Image Gallery
Chapter 225: Deltoid Ligament Injury
Key Facts
Key Images
Main Text
Image Gallery
Chapter 226: Spring Ligament Injury
Key Facts
Key Images
Main Text
Image Gallery
Chapter 227: Chopart Joint Injury
Key Facts
Key Images
Main Text
Image Gallery
Chapter 228: MTP Ligament Injury, Digit 1
Key Facts
Key Images
Main Text
Image Gallery
Chapter 229: MTP Ligament Injury, Digits 2-5
Key Facts
Key Images
Main Text
Image Gallery
MUSCLES AND TENDONS
Chapter 230: Achilles Tendon Injury
Key Facts
Key Images
Main Text
Image Gallery
Chapter 231: Flexor Hallucis Longus Tendon Injury
Key Facts
Key Images
Main Text
Image Gallery
Chapter 232: Posterior Tibial Tendon Dysfunction
Key Facts
Key Images
Main Text
Image Gallery
Chapter 233: Flexor Retinaculum Avulsion
Key Facts
Key Images
Main Text
Image Gallery
Chapter 234: Extensor Tendon Injury, Ankle and Foot
Key Facts
Key Images
Main Text
Image Gallery
Chapter 235: Peroneal Tendon Injury
Key Facts
Key Images
Main Text
Image Gallery
Chapter 236: Superior Peroneal Retinaculum Avulsion
Key Facts
Key Images
Main Text
Image Gallery
Chapter 237: Muscle Injury, Foot
Key Facts
Key Images
Main Text
Image Gallery
Chapter 238: Plantar Fascia Injury
Key Facts
Key Images
Main Text
Image Gallery
OTHER
Chapter 239: Anterior Impingement, Ankle
Key Facts
Key Images
Main Text
Chapter 240: Anterolateral Impingement, Ankle
Key Facts
Key Images
Main Text
Image Gallery
Chapter 241: Posterior Impingement, Ankle
Key Facts
Key Images
Main Text
Image Gallery
Chapter 242: Haglund Syndrome
Key Facts
Key Images
Main Text
Image Gallery
Chapter 243: Sinus Tarsi Syndrome
Key Facts
Key Images
Main Text
Image Gallery
Chapter 244: Ankle and Subtalar Instability
Key Facts
Key Images
Main Text
Image Gallery
Chapter 245: Sever Disease
Key Facts
Key Images
Main Text
Image Gallery
Chapter 246: Nerve Injury
Key Facts
Key Images
Main Text
Image Gallery
Chapter 247: Tarsal Tunnel Syndrome
Key Facts
Key Images
Main Text
Image Gallery
POSTOPERATIVE
Chapter 248: Lateral Ligament Reconstruction, Ankle
Key Facts
Key Images
Main Text
Image Gallery
Chapter 249: Tendon Repair, Ankle
Key Facts
Key Images
Main Text
Image Gallery
Chapter 250: Amputation, Foot/Ankle
Key Facts
Key Images
Main Text
Image Gallery
INDEX
| An aparitie | 26/05/2021 |
| Autor | Donna G Blankenbaker MD FACR , Kirkland W. Davis MD FACR |
| Editura | Elsevier |
| Format | Hardcover |
| ISBN | 9780323793933 |
| Limba | Engleza |
| Nr pag | 1200 |
-
-
 1,47700 lei 1,26000 lei
 -
-
-
-
-
Clientii ebookshop.ro nu au adaugat inca opinii pentru acest produs. Fii primul care adauga o parere, folosind formularul de mai jos.